
Last Updated on December 28, 2024 by Kimberly Stroh
Are you looking for a fun way to build excitement around your upcoming Disney vacation? This is the perfect craft to create a visual countdown that the whole family can enjoy. The best part of this craft is how easy & budget-friendly it is. You can find all of the supplies for this Disney Countdown Wreath at your local dollar store.
Be creative as you want with this craft and let it be inspired by your favorite Disney character! You can do pink and white colors for Minnie Mouse or even blue, yellow and white for Donald Duck inspiration.
Once you’ve finished, hang it in your kitchen or family room and change your countdown number each day. You can reuse the wreath for your next Disney vacation too. I promise that the kids will be excited when they see this wreath come out of storage again – that means they’ve got a Disney vacation on the horizon.


How To Make Your DIY Disney Countdown Wreath
What You’ll Need:
- Wire floral wreath – mine is 12 inches
- Wooden clothespins – I purchased 3 packs of 44 each and had some left over.
- Small picture frame
- Mod Podge
- Black glitter
- Chalkboard paint
- Red acrylic paint
- Black acrylic paint
- White acrylic paint
- Paint brushes
- Strong glue – you can use either a hot glue gun or E6000
I highly suggest using a glue gun or E6000 glue so it has a strong hold. You want to be able to re-use this craft for years to come. Don’t worry about expensive brushes because there’s no detail work involved. I shopped at our local Dollar General, but a Dollar Tree or 99 Cent Store would work as well!


Take the glass out of the picture frame.


Set the frame to the side.


Paint the glass of the picture frame with a thin layer of chalkboard paint. Let it dry and paint an additional coat. I ended up painting 4 thin layers of paint on mine, just to be safe!


The number of clothespins that you use will depend on the size of the wreath. Before you get started, arrange the clothespins on part of the wreath to get an estimate of how many you will need to paint. It only takes a second to arrange them! For this wreath, there are 2 layers of clothespins. One on the outer rim and one on the center.


Paint half of the needed clothespins red and half of them black. Be sure to paint the sides and ends!
TIP: I keep (or reattach) the clothespins on the cardboard sleeve that they come on while I am painting the tops and bottoms. It makes painting many of them at once possible.


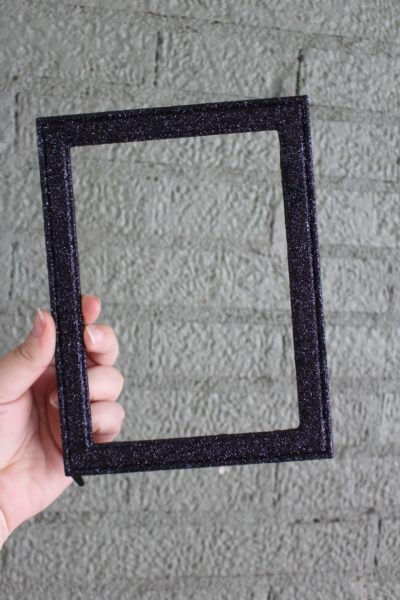
While the clothespins are drying, take a bit of Mod Podge and coat part of the frame you had set aside.


Sprinkle generously with black glitter.


Continue until the frame is fully covered.

Once everything is dry, begin to assemble your wreath. Start with the outer layer of clothespins. Then, clip the center layer of clothespins to the wreath. You can glue them in place, but I didn’t find it necessary for ours.


Reassemble your frame. If you have a Cricut or vinyl cutting machine you can cut out the words for your chalkboard, but I just wrote them with a bit of white acrylic paint. Be sure to leave space for you to write with chalk the number of days as you countdown!
Using hot glue or a strong glue (I used E6000) glue the frame to the center of the wreath directly on the clothespins.


DIY Disney Countdown Wreath

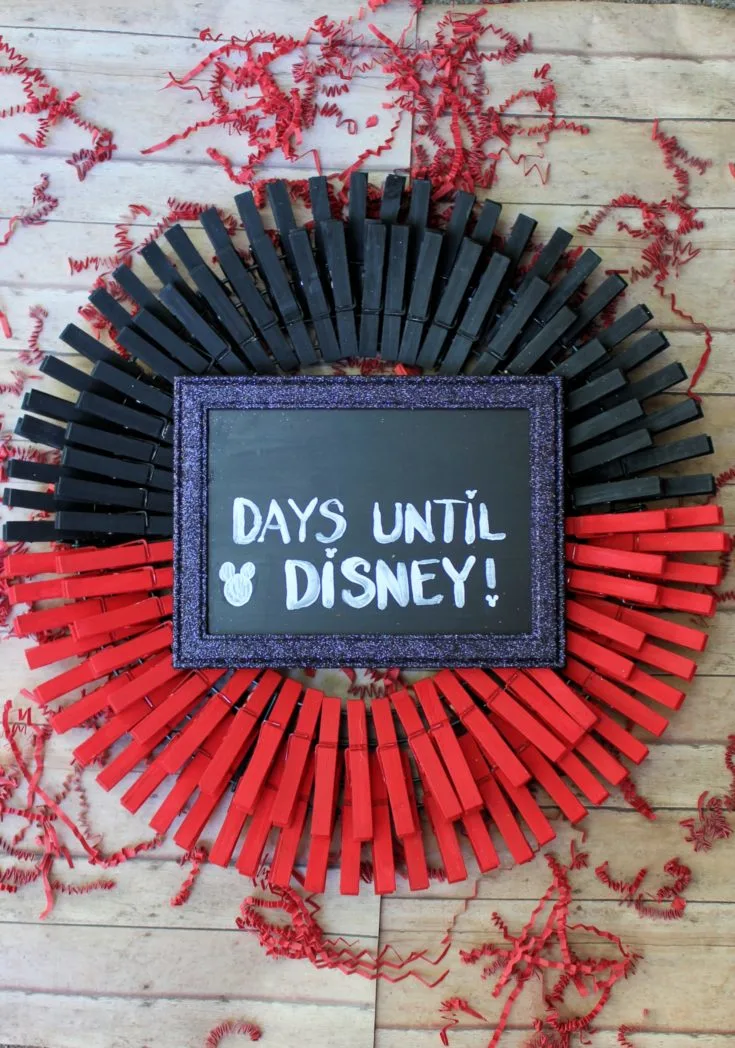
A fun Disney vacation countdown craft, all of this wreath's supplies can be found at your local dollar store.
Materials
- Wire floral wreath - mine is 12 inches
- Wooden clothespins - I purchased 3 packs of 44 each and had some left over.
- Small picture frame
- Mod Podge
- Black glitter
- Chalkboard paint
- Red acrylic paint
- Black acrylic paint
- White acrylic paint
- Paint brushes
- Strong glue - you can use either a hot glue gun or E6000
Instructions
- Take the glass out of the picture frame. Set the frame to the side.
- Paint the glass of the picture frame with a thin layer of chalkboard paint. Let it dry and paint an additional coat. I ended up painting 4 thin layers of paint on mine, just to be safe!
- The number of clothespins that you use will depend on the size of the wreath. Before you get started, arrange the clothespins on part of the wreath to get an estimate of how many you will need to paint. It only takes a second to arrange them! For this wreath, there are 2 layers of clothespins. One on the outer rim and one on the center.
- Paint half of the needed clothespins red and half of them black. Be sure to paint the sides and ends!
TIP: I keep (or reattach) the clothespins on the cardboard sleeve that they come on while I am painting the tops and bottoms. It makes painting many of them at once possible.
- 5. While the clothespins are drying, take a bit of Mod Podge and coat part of the frame you had set aside.
- 6. Sprinkle generously with black glitter.
- 7. Continue until the frame is fully covered.
- 8. Once everything is dry, begin to assemble your wreath. Start with the outer layer of clothespins.
- 9. Then, clip the center layer of clothespins to the wreath. You can glue them in place, but I didn’t find it necessary for ours.
- 10. Reassemble your frame. If you have a Cricut or vinyl cutting machine you can cut out the words for your chalkboard, but I just wrote them with a bit of white acrylic paint. Be sure to leave space for you to write with chalk the number of days as you countdown!
- 11. Using hot glue or a strong glue (I used E6000) glue the frame to the center of the wreath directly on the clothespins.
YOU MAY ALSO LIKE THESE DISNEY CRAFTS: